
The Supplier Registration form looks very similar to that of Suppliers.
Company Tab
- The Supplier should fill in the details.
- You can also Download the supplier registration form in the form of an Excel template, fill in the details and upload the Excel to fill the registration form. This allows the buyer to download the form, send it to the supplier, and get it filled out by the supplier itself. This filled template can then be uploaded into MeRLIN.
- Fields marked with an asterisk (*) are mandatory.
- Choose the Company NAICS and SIC codes from the available list. You can also verify the DUNS number at this stage.
- Once you have completed the Company tab, you may proceed to the next section by clicking on the next tab.
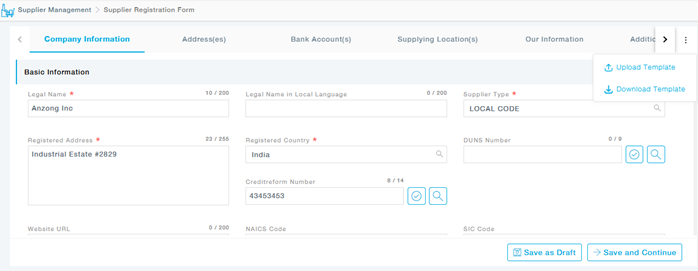
Also, at this stage, you can save the Registration form as a Draft by clicking on the Save As Draft button. If the form is incomplete and all details are not available for filling up, all entered details can be saved as Draft.
- Information saved as a draft will be retained across devices and login sessions. Hence, even if the user logs out from a device and logs in using the same credential across a different device, information can still be seen and edited.
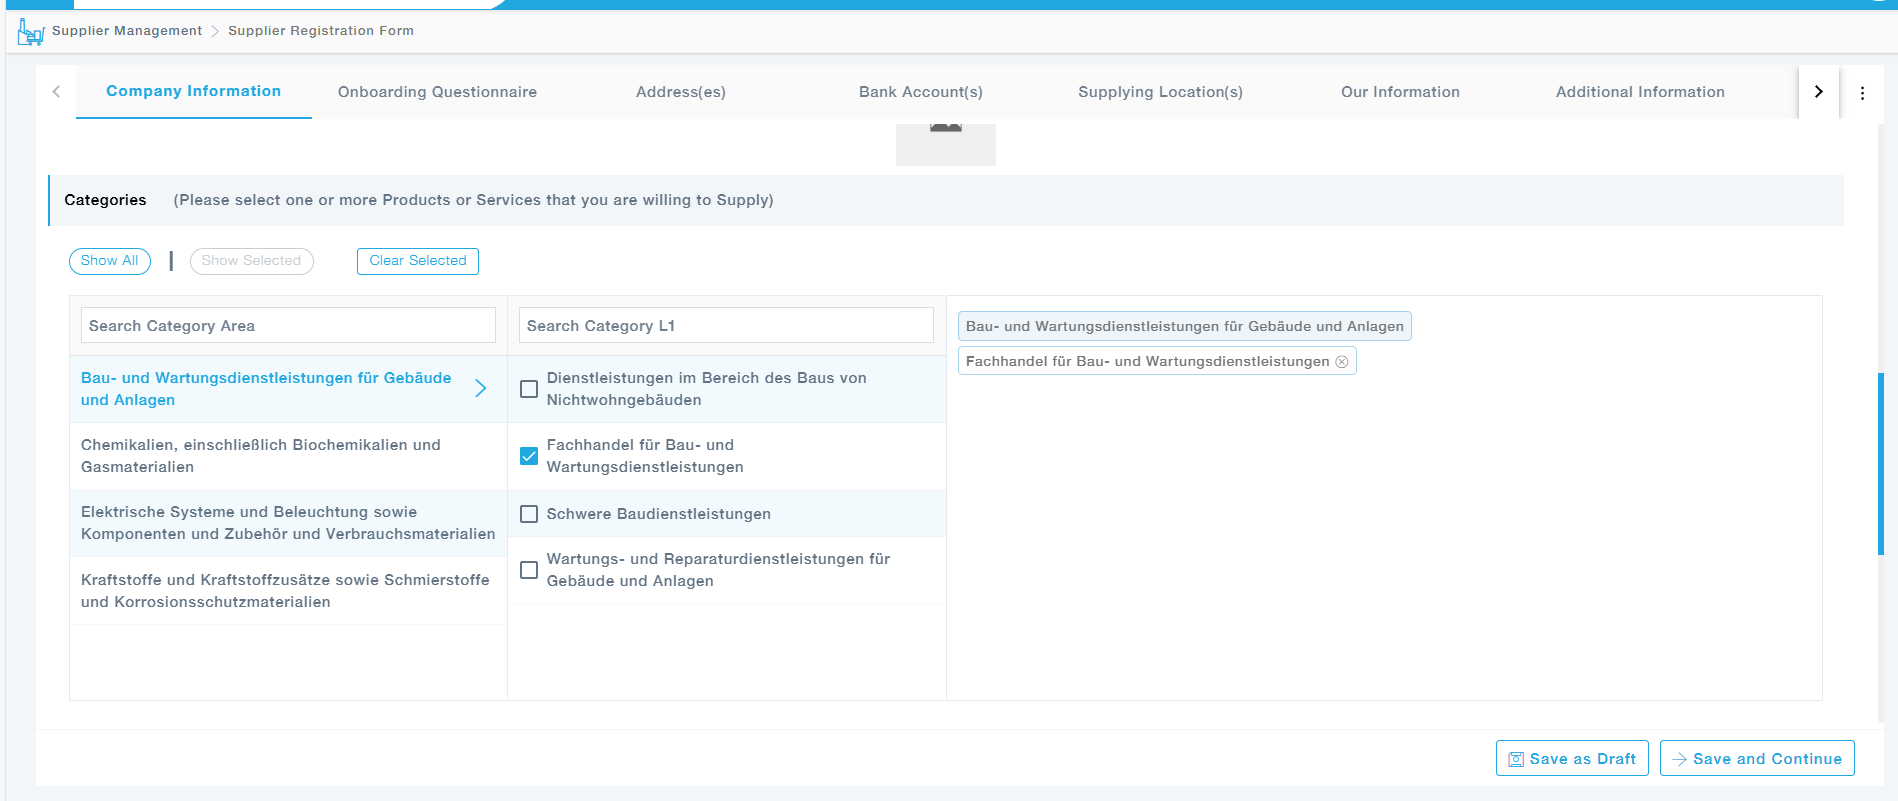
- Users first choose a Category area from a list.
- Based on the selected area, relevant L1 subcategories are displayed for selection.
- Users can only select specific subcategories, as checkboxes are not available at the category area level.
- Users can remove or change selections by choosing a different category area and its corresponding subcategories.
- This new category selection design is implemented across the buyer portal, supplier portal, and interest rate supplier forms to ensure uniformity in all supplier-related processes.
- When the supplier fills the registration form, and if the categories pre-selected by the buyer during the invitation process will be automatically populated as specified below. The supplier may review and modify these selections as needed
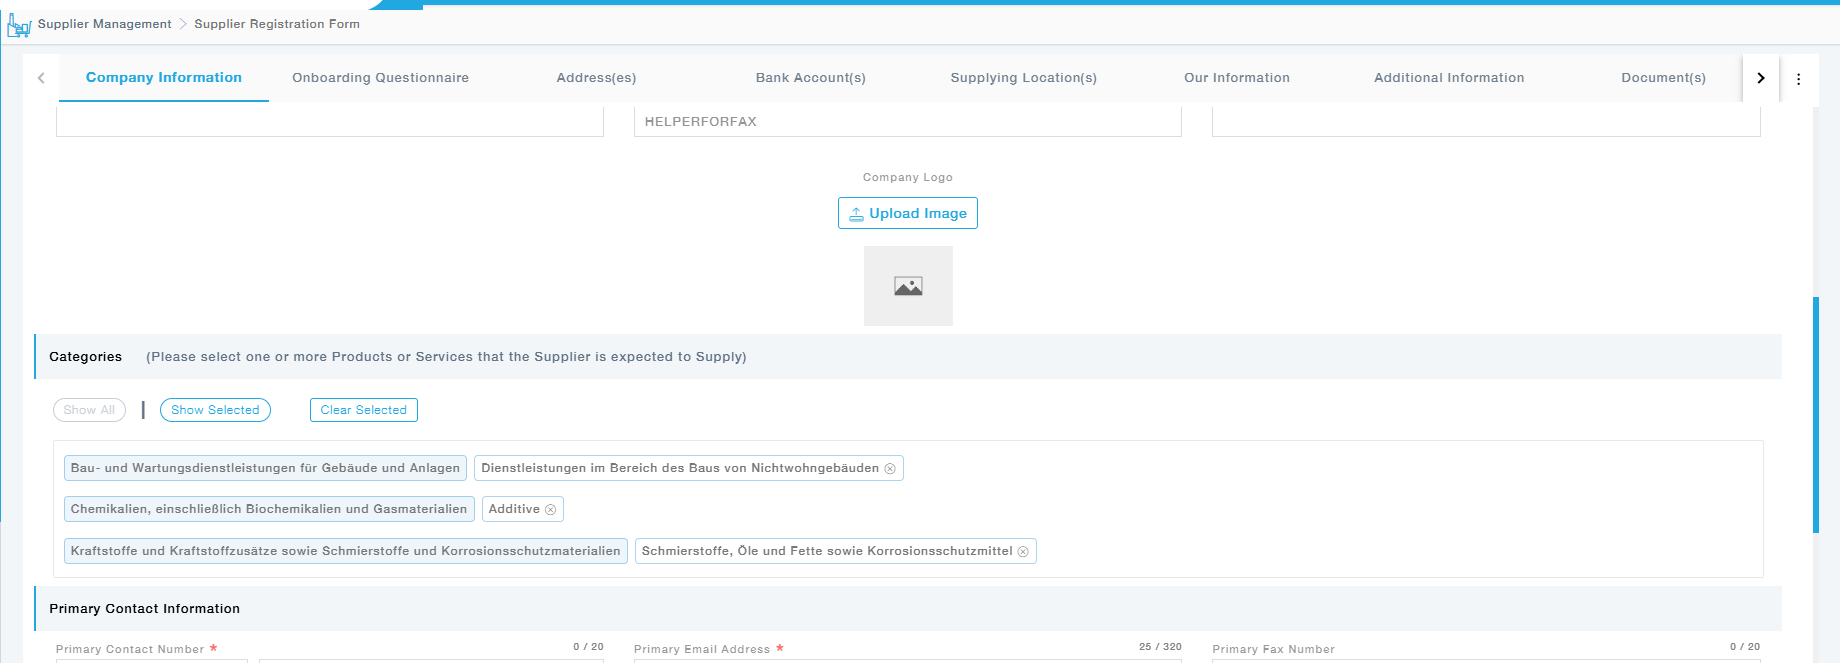
- Further, provide the Social Media details.
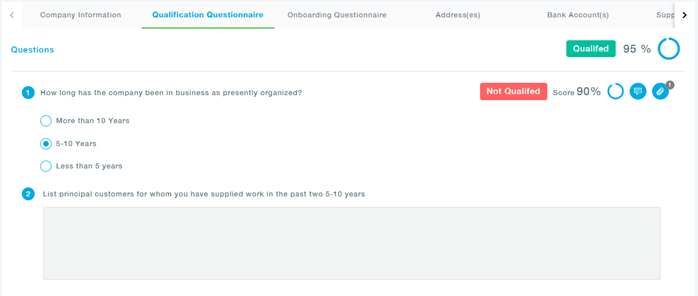
Qualitifcation Questionnaire
The response to the qualification questionnaire from the Interested Form will be displayed under this tab, including all the attachments and comments provided. This tab will be enabled only if the supplier is onboarded from the supplier interested form.
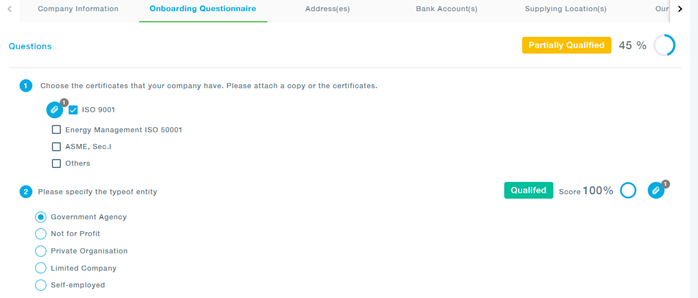
Onboarding Questionnaire
The response to the onboarding questionnaire will be displayed under this tab, including all the attachments and comments provided.
If there are onboarding questions that are the same as the Qualifications questionnaire, the answers provided by the supplier during the qualification questionnaire round will be automatically fetched.
Compliance Questionnaire
The response to the Compliance Survey will be displayed under this tab, including all the attachments and comments provided.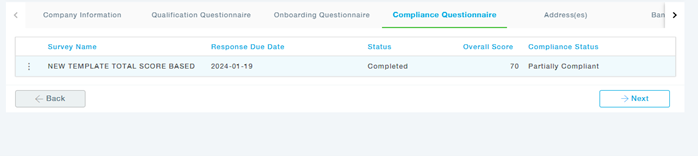
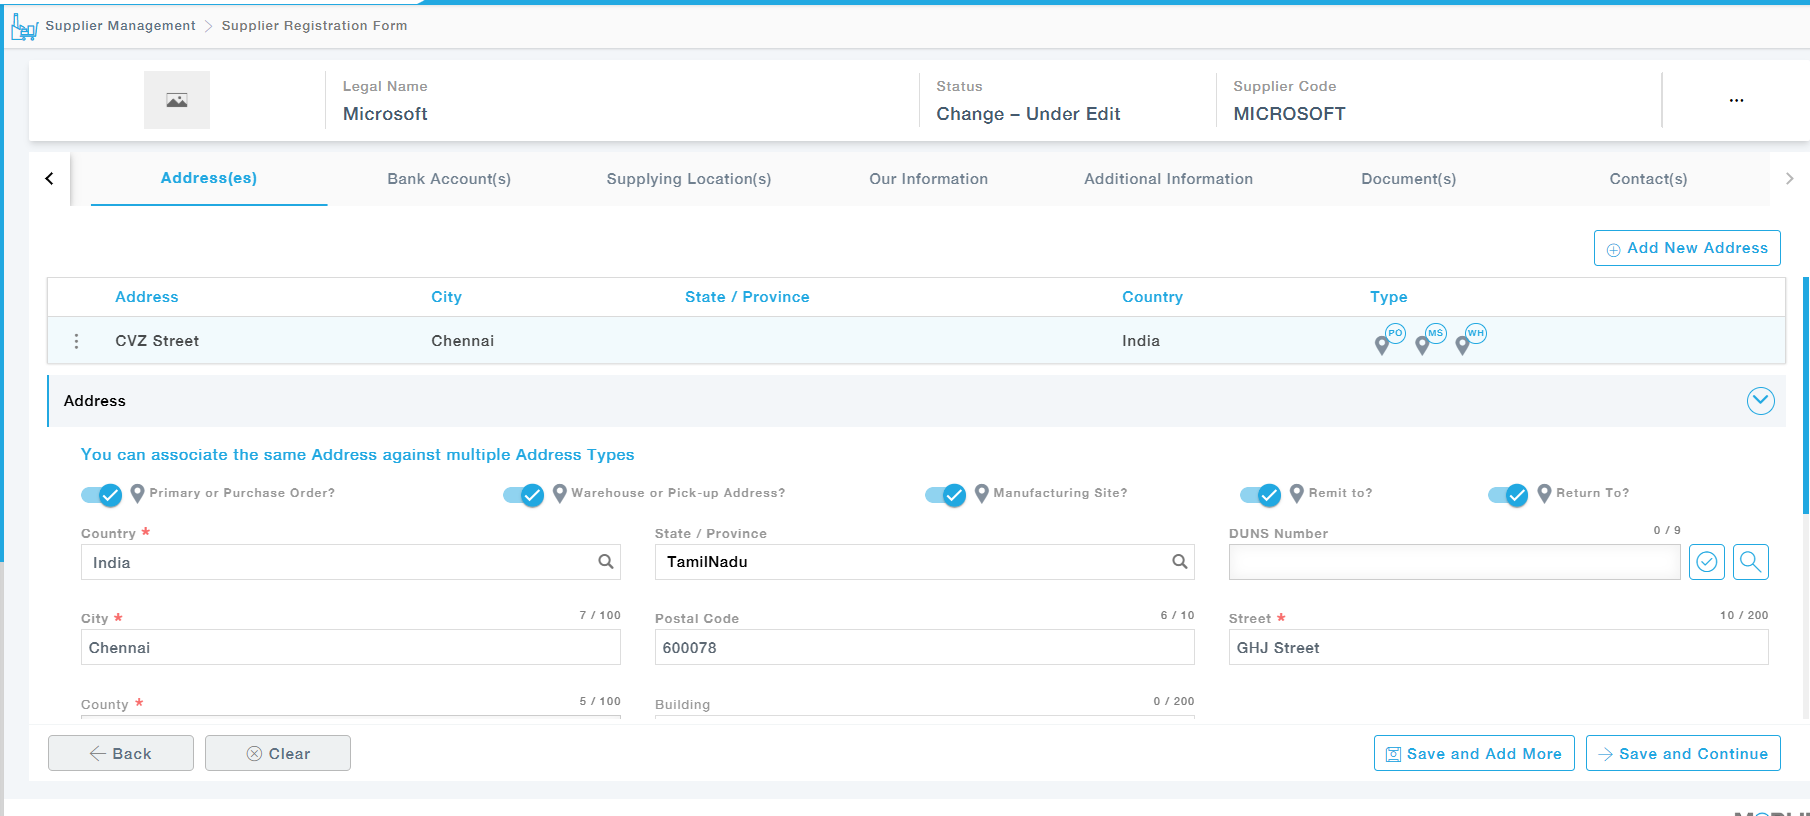
Address(es)
Choose the type of address, whether Primary/Remit/Manufacturing/Warehouse/Return address and then provide the address. Enter the DUNS number. You can also provide the address in the Local Language. Once the address is provided, click on the Save and Continue to save the address and move to the next tab or Save and Add More button to add more addresses. You can add multiple addresses under the Addresses tab. You can choose the precise location with the help of integrated google map.
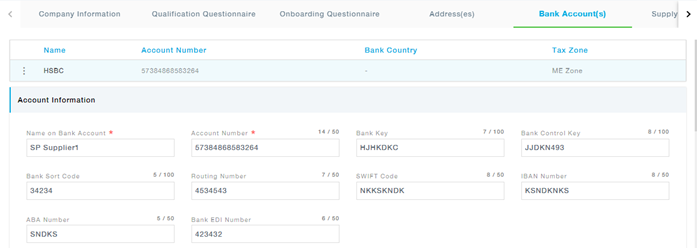
Bank Account Details
Enter the bank account details and click on Add and Save more to add more bank accounts.You can have multiple bank accounts.
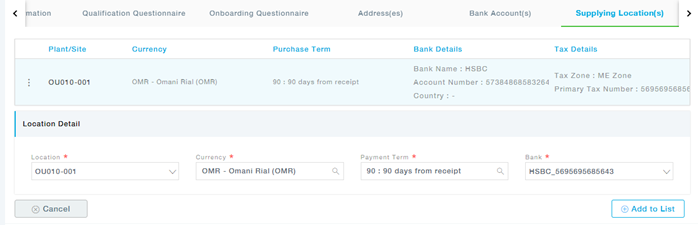
Supplying Locations
Fill in the details. Save the Suppling location by clicking on the Save and Continue to move to the next page, or Save and Add More to add more locations.
Our Information
Provide the additional information as requested and proceed to the next tab.

Additional Information
Fill in the requested Additional Information, these information are specific to the Categories selected for the Supplier.
Documents
After providing all relevant information, the supplier will need to attach relevant documents to support the information provided. The documents can be uploaded using this tab.
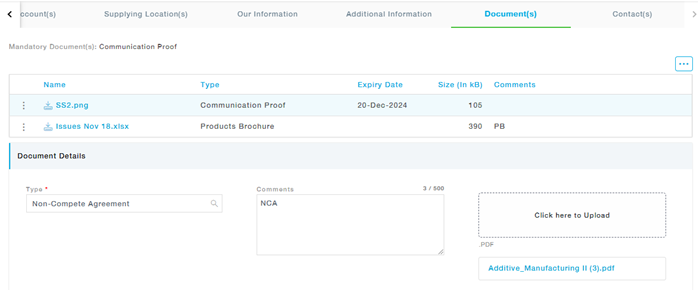
- A list of mandatory attachments can be seen.
- Choose the Document Type, Provide Comments and upload the File.
- In case of attachments with an Expiry date, the Supplier gets to an inactive state until the updated document is attached. Also, the supplier will be notified before the expiry of the document and will be provided with a grace period that will be configured by the buyer.
- You can click on the Download All button to download all the documents you have uploaded so far in the form of a zip file.
- For an existing approved supplier, documents cannot be deleted, they can only be archived. Further, you are provided with the provision to view and download these archived files as required.
Provide your contact information. Click on the +Add to List button to get the contact added to the Contact List. You can choose the Title of the Contact, and choose the Functions that need to be assigned to the Contact. Also, choose for what all functions the Contact should be notified under the Notifications dropdown.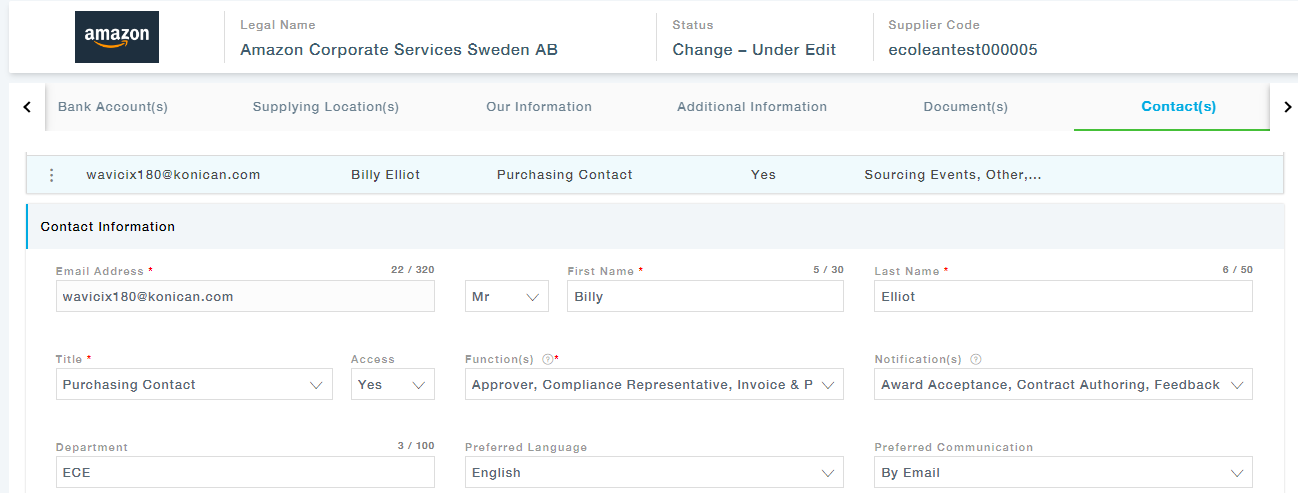
Submit
- Once all necessary information is correctly entered, the Supplier needs to click on Submit.
- The system may show some error messages depending on the gaps in the information provided. Locations of such errors are highlighted by red-colored boxes. The Supplier needs to correct all of them for successful submission.
Note: Every time the responsible buyer edits the Supplier Information, the Buyer will have to attach the Proof of Communication document under the Document tab before submitting the edited form. This document can be viewed by the Supplier under the Documents tab of the Supplier Information form.