
Click on the Add Service item button to add non-catalogue items to the requisition.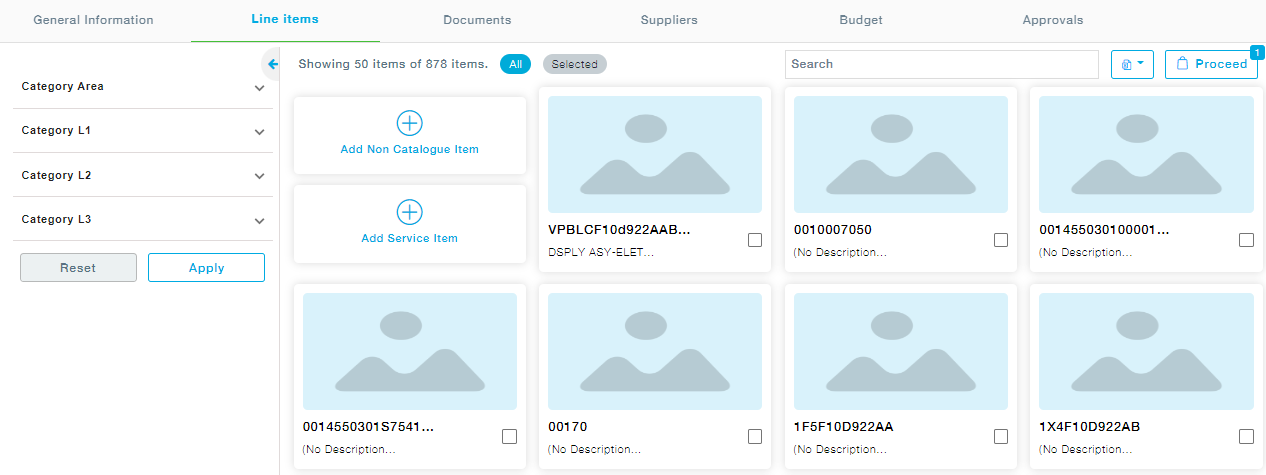
In the screen that appears, provide the item details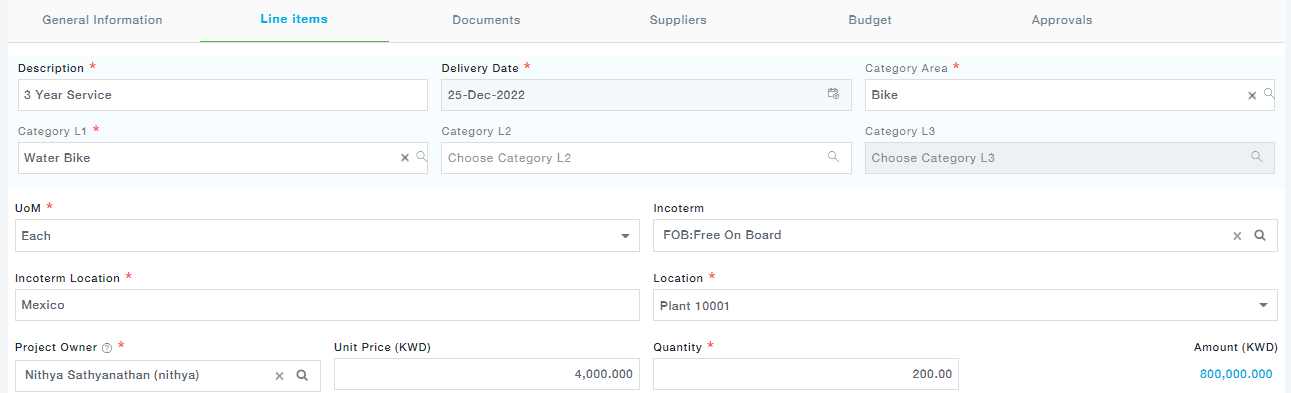
Under the Milestones tab, provide one or more milestones by clicking on the “+” button. Click on Save and Continue to move to the next tab.
Under the Statement of Work tab, you are provided with the text editor. Provide the detailed Statement of Work for the selected service.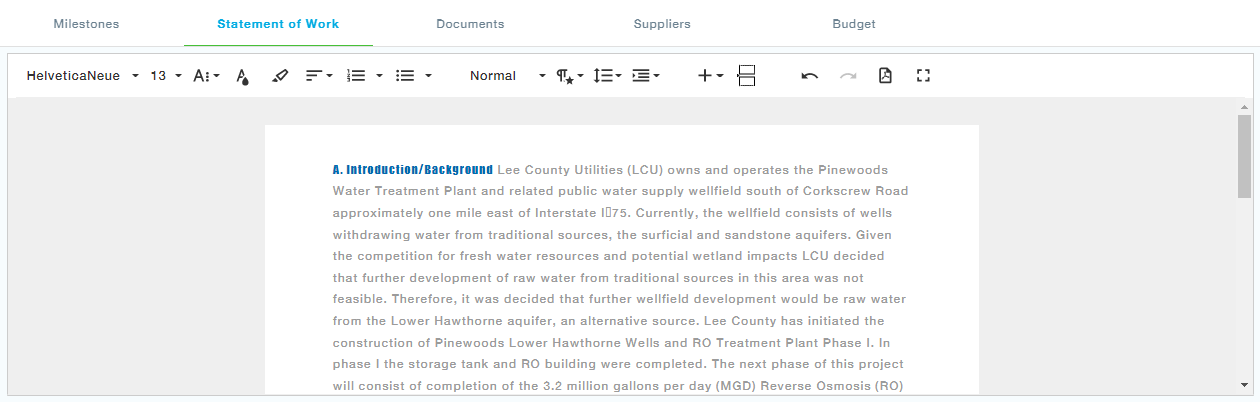
Under the Documents tab, add the documents relevant to the item and click save.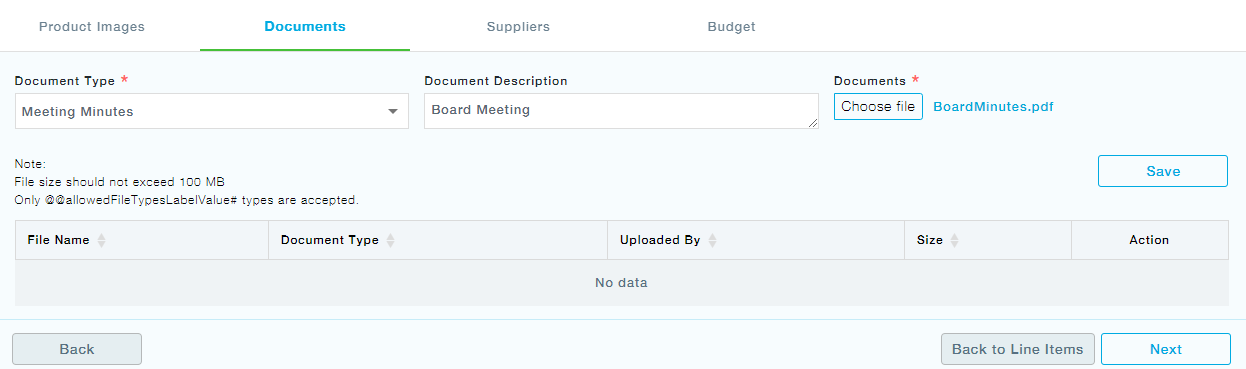
Under the Supplier tab, add one or more suppliers to the item.
Now under the Budget Tab, choose the budget from the available list and assign to the item.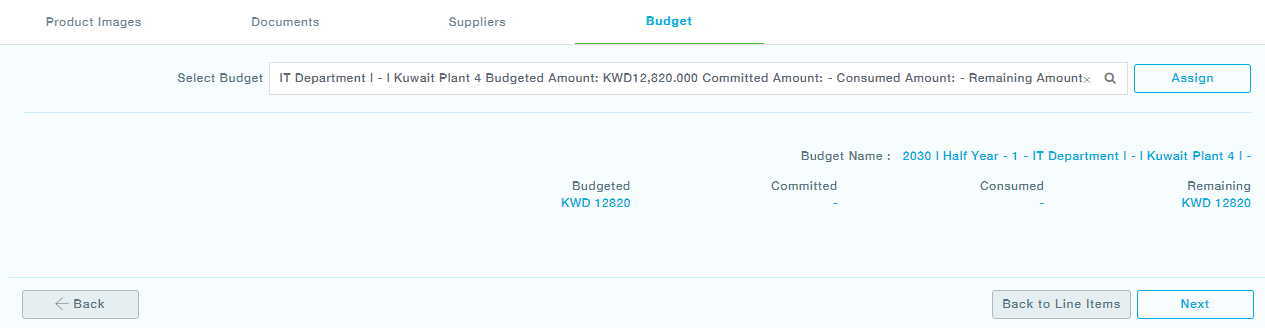
As you click Next, you will reach the items list. Now you can Click on the Back to List Items button and add the next item.
Now you can move to the Suppliers tab, followed by Budget and save the list of items like already seen for Catalogue Items.
UPLOAD ITEMS IN BULK
Alternatively, if you would like to upload multiple parts in bulk, you can download the excel sheet template, fill in the details and then upload them using the upload option which is detailed below.
Download the Excel Template by clicking on the Excel button as shown below.
There are two options provided while downloading the Excel sheet.
- Catalogue Item
- Non-Catalogue Item
To add Catalogue Items in bulk, click on the download – Catalogue Item and fill in the details and save the file.
Similarly, to add Non Catalogue Items in bulk, click on the Non Catalogue Item and fill in the details and save the file.
There are two Upload Options available, one for Uploading the Catalogue Item and the other for uploading the Non – Catalogue Item.
How to add items in bulk?
Click on the Excel file button. To upload Catalogue Items, choose Catalogue Item, similarly, to upload the Non Catalogue items, choose Non-Catalogue Items.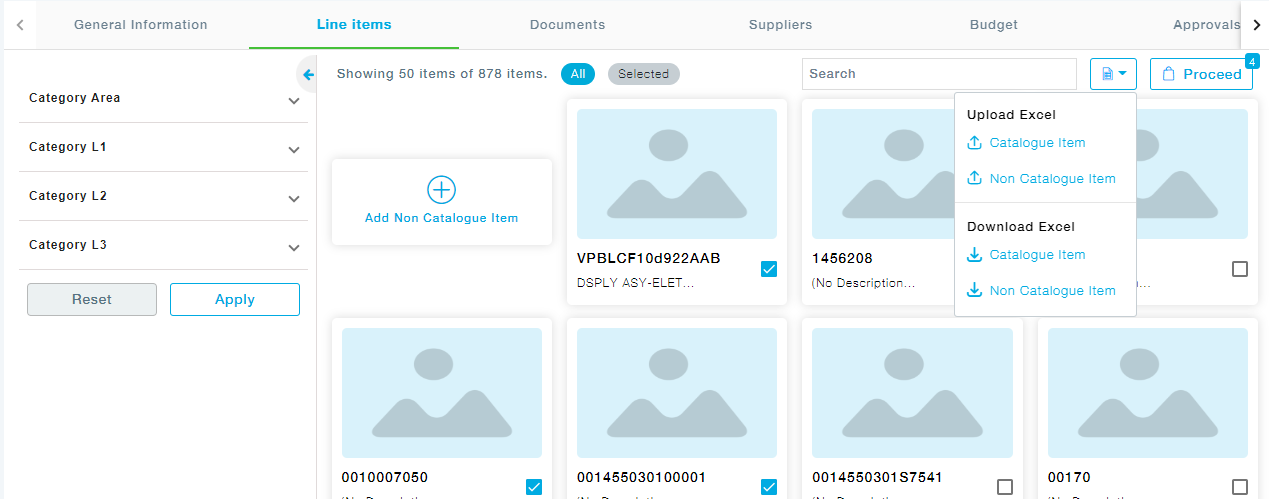
For Catalogue Items: The Upload dialogue appears, click on choose file to upload the prefilled excel sheet to upload the Catalogue parts.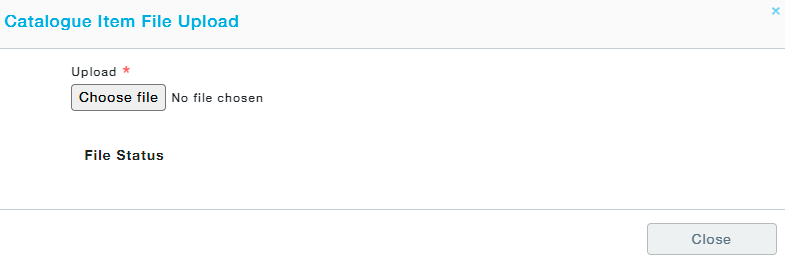
Click the Upload button after choosing the file.
The status reads Success if the parts have been added successfully. In case, the status shows Error, the file can be downloaded, and the downloaded file shows the error. The error can be rectified and the file can be uploaded again.
Click on the Error to download the file and look out for the column “Error”. Errors will be added as a new column at the end. You can rectify the mistakes and try uploading the file again.
Note: Make sure you remove the column Error before uploading the file.
For Non-Catalogue Items: Repeat the upload steps already seen above for the Catalogue Items by choosing Non-Catalogue Items from the Upload Excel button.
If there are any active contracts available for the chosen items, the following screen appears. Choose one or more active contracts and click on proceed if you would like to create a PO. This PO will appear in the Purchase Order Management under Material Purchase order with the PO type – Contract Auto PO once the requisition has been approved.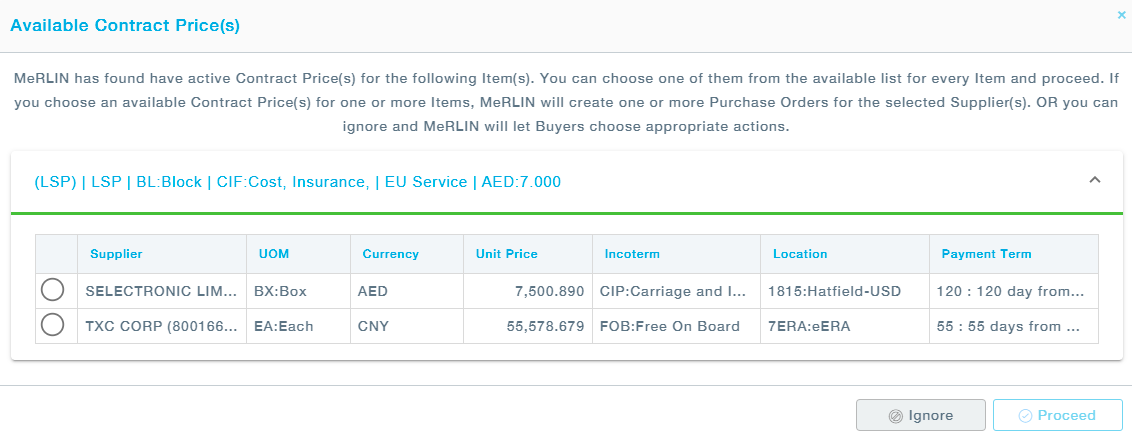
Select the contract and click on proceed.
The following Pop up appears. Click on Yes to confirm the Contract Price you have chosen.
5. DOCUMENTS tab, click on the Add Document button to add new supporting files. Provide the Document Type and Description, and then choose the file.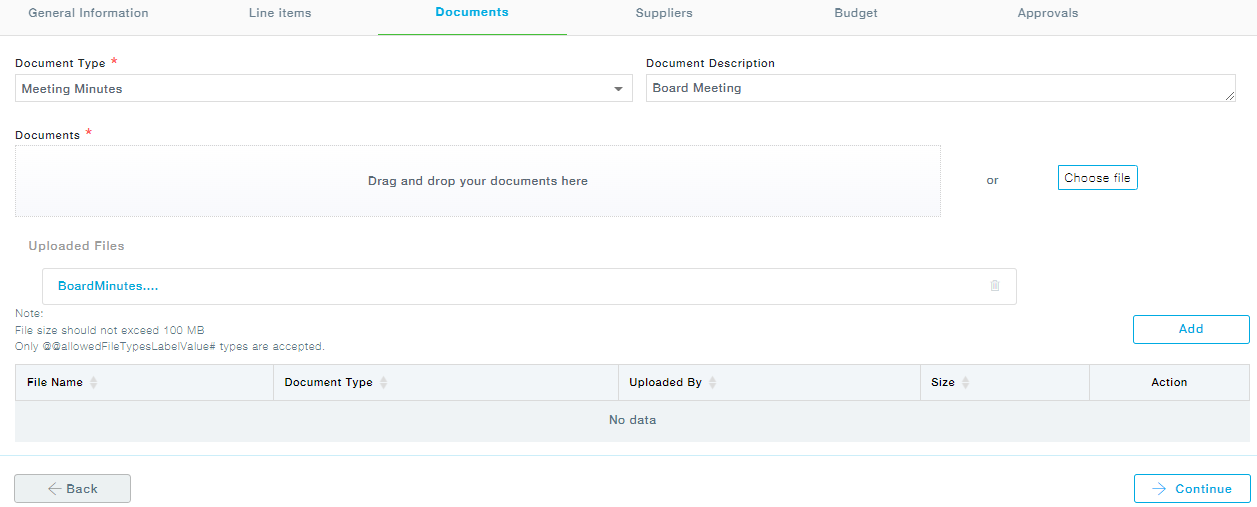
6. Suppliers tab, you can view all the suppliers mapped to each item in the requisition.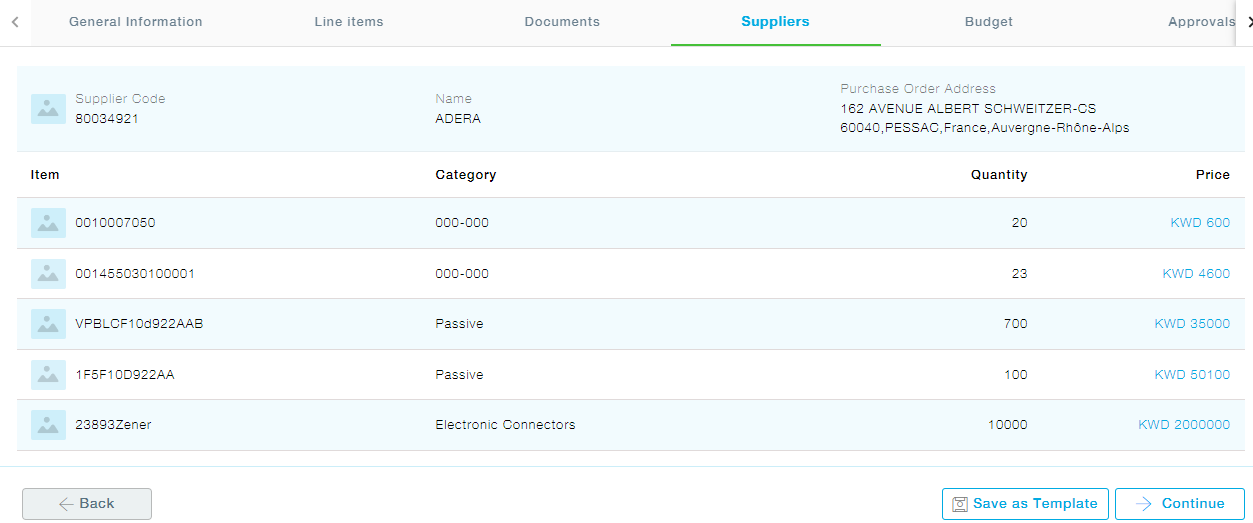
Click on Continue to proceed with the requisition. Also, at this stage, you can save the requisition as a template by clicking on Save as Template button and reuse.
7. Budget: Similar to the Documents tab, the Budget tab is also a view-only page.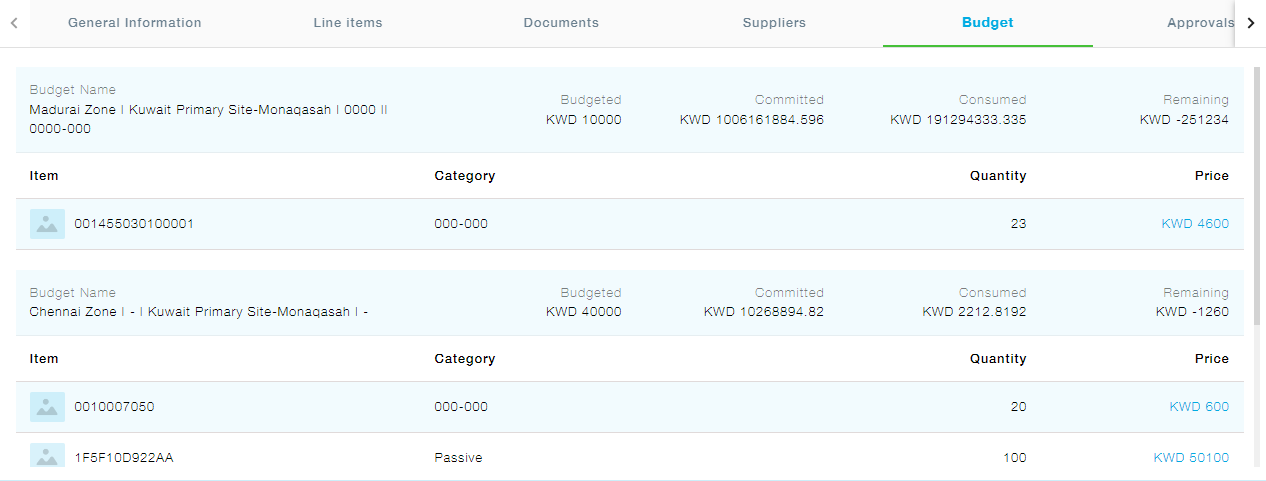
Column Description
- Budgeted: Total budgeted amount for the Item Category
- Committed: When a Purchase Requisition associated with one or more budgets is approved, the amount associated with the line items is tagged as a committed budget.
In Spot Purchase Order, when the PO gets approved, the amount is displayed under committed, and once the Supplier accepts the PO, the amount moves from Committed to Consumed.
- Consumed: When a new Purchase Order associated with a budget is accepted by the Supplier, the amount associated with the line items of the PO is tagged as Consumed Budget. When a PO, created from the requisition is accepted by the supplier, the committed budget amount of the requisition is moved to the consumed budget amount.
- Remaining: The remaining budget amount.
All the Budget related information is for reference only. MeRLIN does not stop you from submitting any requisitions based on the budgets allocated. You can still go further and submit your requisition if there is no remaining amount.
Click Continue to proceed with the approval.
8. The Approval tab will show you the list of approval roles. The approver levels you see as you land on this tab are as per the configuration set by your organization.
You can provide your Comments and select an approver user for every role presented by MeRLIN.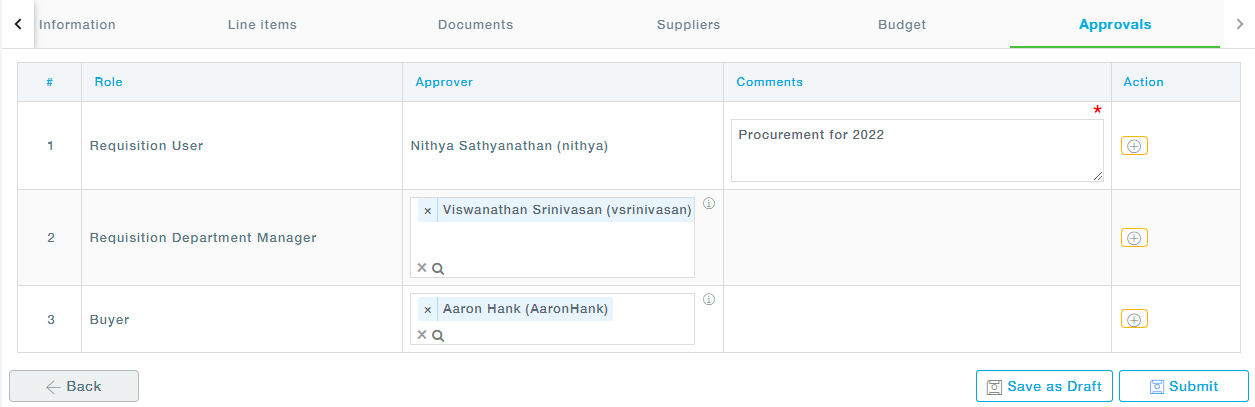
Additionally, you can choose to add an approver by clicking on the Add New Approval Level below under the Action for each level.
In the newly added row, choose a Role and an Approver.
9. Click on Submit button to submit the form for Approval. Once submitted, you cannot edit the requisition.
You may click on Save As Draft to save the entered requisition as Draft if you would like to come to the requisition at a later point and make any changes. The requisition when saved as a draft is not sent for approval. Only after you submit, the requisition will be sent for approval.
Once the requisition is submitted, it goes through a serial approval process i.e., only after the first approver approves the requisition, it goes to the second approver, and so on. The status of the requisition changes from Pending for Approval to Approved once the final approver approves the requisition.
After the submission of the requisition, the requestor can go back to the Requisitions list, to Track Requisitions.