
3.Approval Dashboard
The approval dashboard is a centralized screen that will list all the approval requests pending for your approval. Click on the Approval Icon on the Home page.
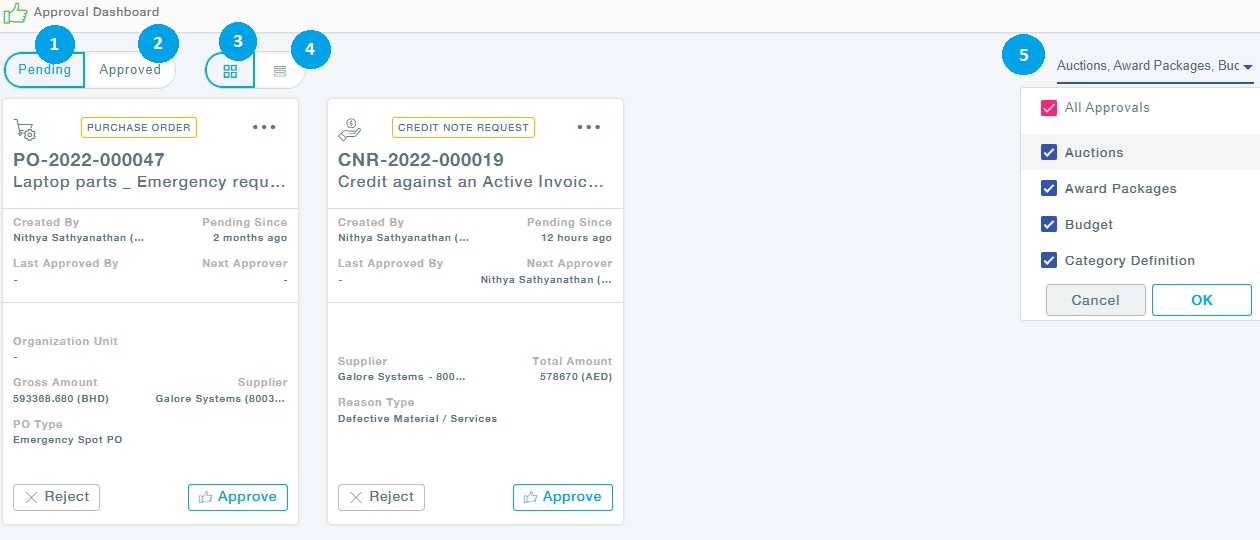
- Pending for Approval: All the requests that are pending for your approval.
- Approved: All the requests already approved by you will be listed.
- Grid View: Grid view of the requests.
- List View: View the requests in List View.
- Filter: Select one or more modules to view the approval requests.
You can click on the Approve button to Approve the request after providing appropriate comments.
- View and Approve
The View and Approve section will let you View the request in detail and then approve the requests. Refer the Approve Requests as an Approver under General Operations for further process details.
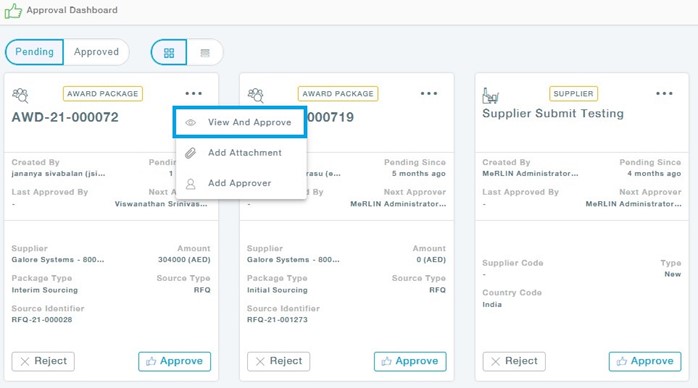
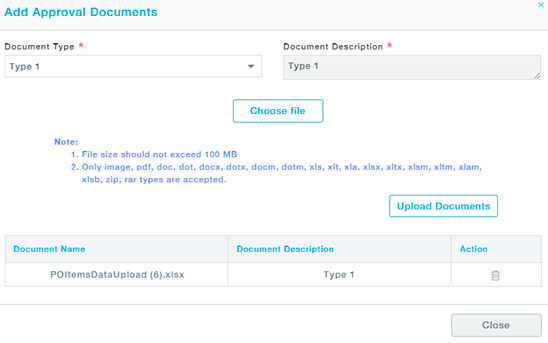
- Add Attachment
Click on the Add Attachment Option.

Choose the document, and upload the document. Click on close to close the window.
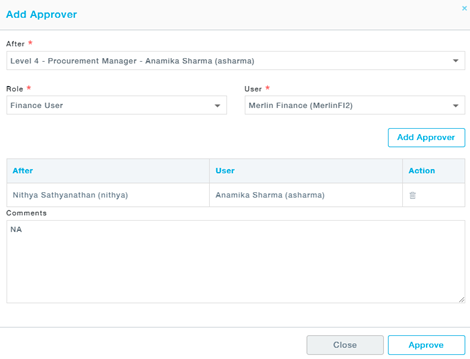
- Add Approver
Choose Add Approver from the list of Options.

You can add approvers in the After* dropdown.
Choose the role, followed by the users available for that role.
Click on the Add Approver button. You can add more than one approvers to the existing approval workflow.
Click on Approve button to approve the request.
Delegation
Delegation management in MeRLIN enables users to assign approval responsibilities to others temporarily or permanently. Approvers can delegate their approval authority for a specified duration, allowing continuity in their absence. Additionally, they have the option to completely transfer all approval duties to another approver. This flexibility ensures that approvals are not delayed due to the unavailability of the original approver. Consequently, business processes maintain their efficiency and consistency.
Menu Path: Approval Dashboard- Delegation
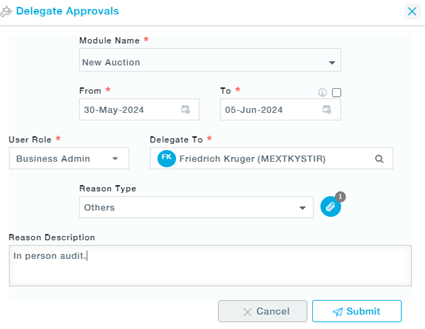
Create New Delegation
Menu Path: Approval Dashboard- Delegation >> Create New
1. Choose the module name and the approvals of one or more modules selected will be delegated.
2. Choose the from-to-date, if you would like to indefinitely delegate/transfer the approvals click on the check box against the To field.
3. Now choose the User Role of the Delegate and the User Name under the Delegate To field.
4. Select the reason for delegation and add attachments if required.
5. Provide the Reason for delegation in detail under the Reason Description and Submit.
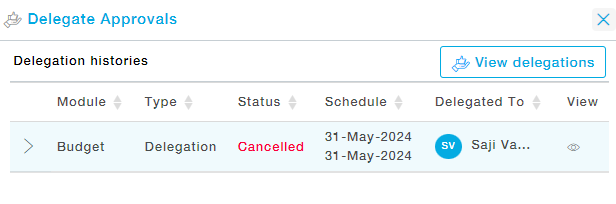
Once the Delegation is made, you will be provided with the following Actions.

- Cancel Delegation: Stop the delegations and no more transactions will be sent to the delegated approver after that.
- Change Schedule: Provision to change the To date of the Delegation.
- View: View the details of the delegation in detail.
Cancelled Delegations:
Once the delegation is cancelled you can view it by clicking on the View History button .
4. Collaborators
Please refer to the collaborators manual for the details.
5. Organization Unit
The list of all Organization Units you have access to will be shown in the form of a drop down. Choose the required Organization Unit to create transactions under that.